
Images
A shoppable image is one picture plus the hotspots you place on it. Everything in the app starts here.
- Creating an Image
- The Images List
- Finding the Image ID
- Editing an Image
- Publishing and Hiding
- Deleting an Image
- Which Images Render on the Storefront
Creating an Image
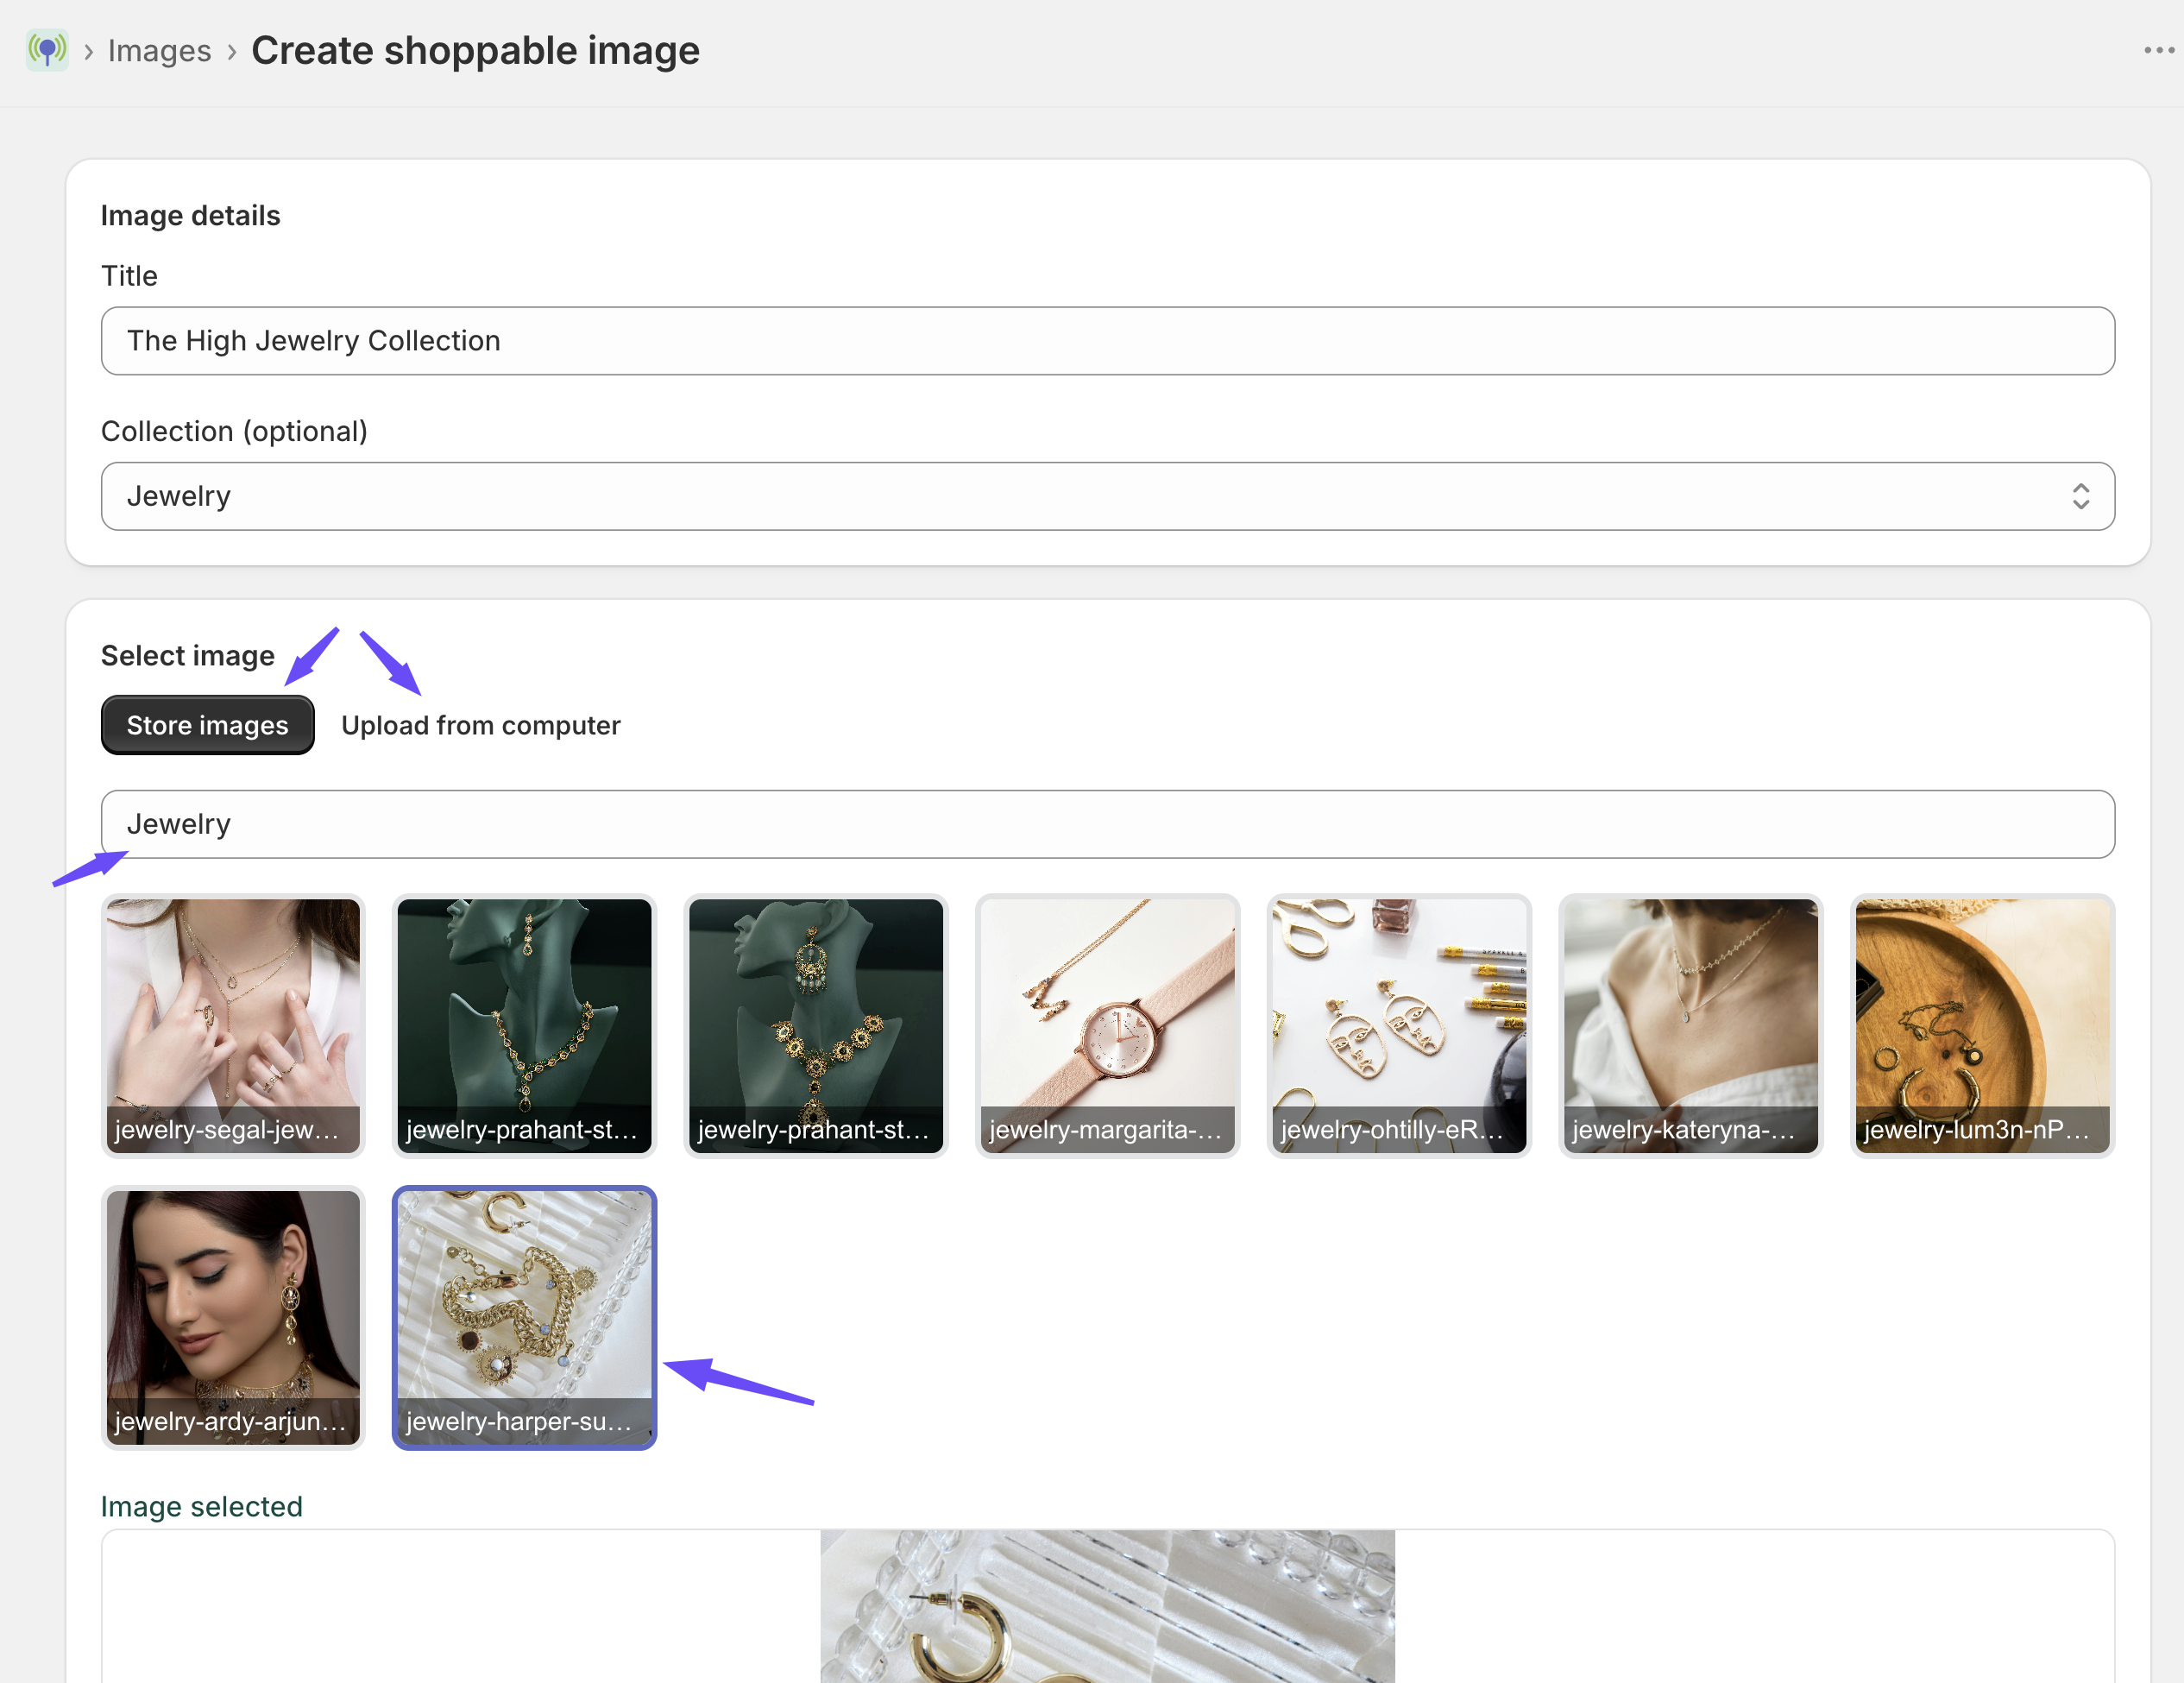
Go to Images in the app navigation and click Create image.
1. Give it a title
The title is for you, not for shoppers — it never appears on the storefront. Use something you will recognise later, like “Spring lookbook — hero” or “Living room flat lay”.
The title is also used when you sort a collection alphabetically, so consistent naming helps if you use collection blocks.
2. Choose the picture
There are two tabs:
Store images — lists the images already in your Shopify Content → Files library. Type in the search box to filter by file name, and use Load more to page through older files. Click a thumbnail to select it.
Upload from computer — pick a file from your device. The app uploads it into your Shopify Files library, then waits for Shopify’s CDN to finish processing it before it can be used.
Note: After an upload, Shopify needs a few seconds to process the file. The app waits automatically. If you save too quickly you may see “That image is still processing. Wait for the upload to finish, then save.” — just wait a moment and save again. Nothing is lost.
3. Assign a collection (optional)
If you already have collections set up, you can pick one here. You can also leave it blank and assign it later. See Collections.
4. Save
Click Save. The app takes you straight to the hotspot editor so you can start placing pins — see Hotspots.
The Images List
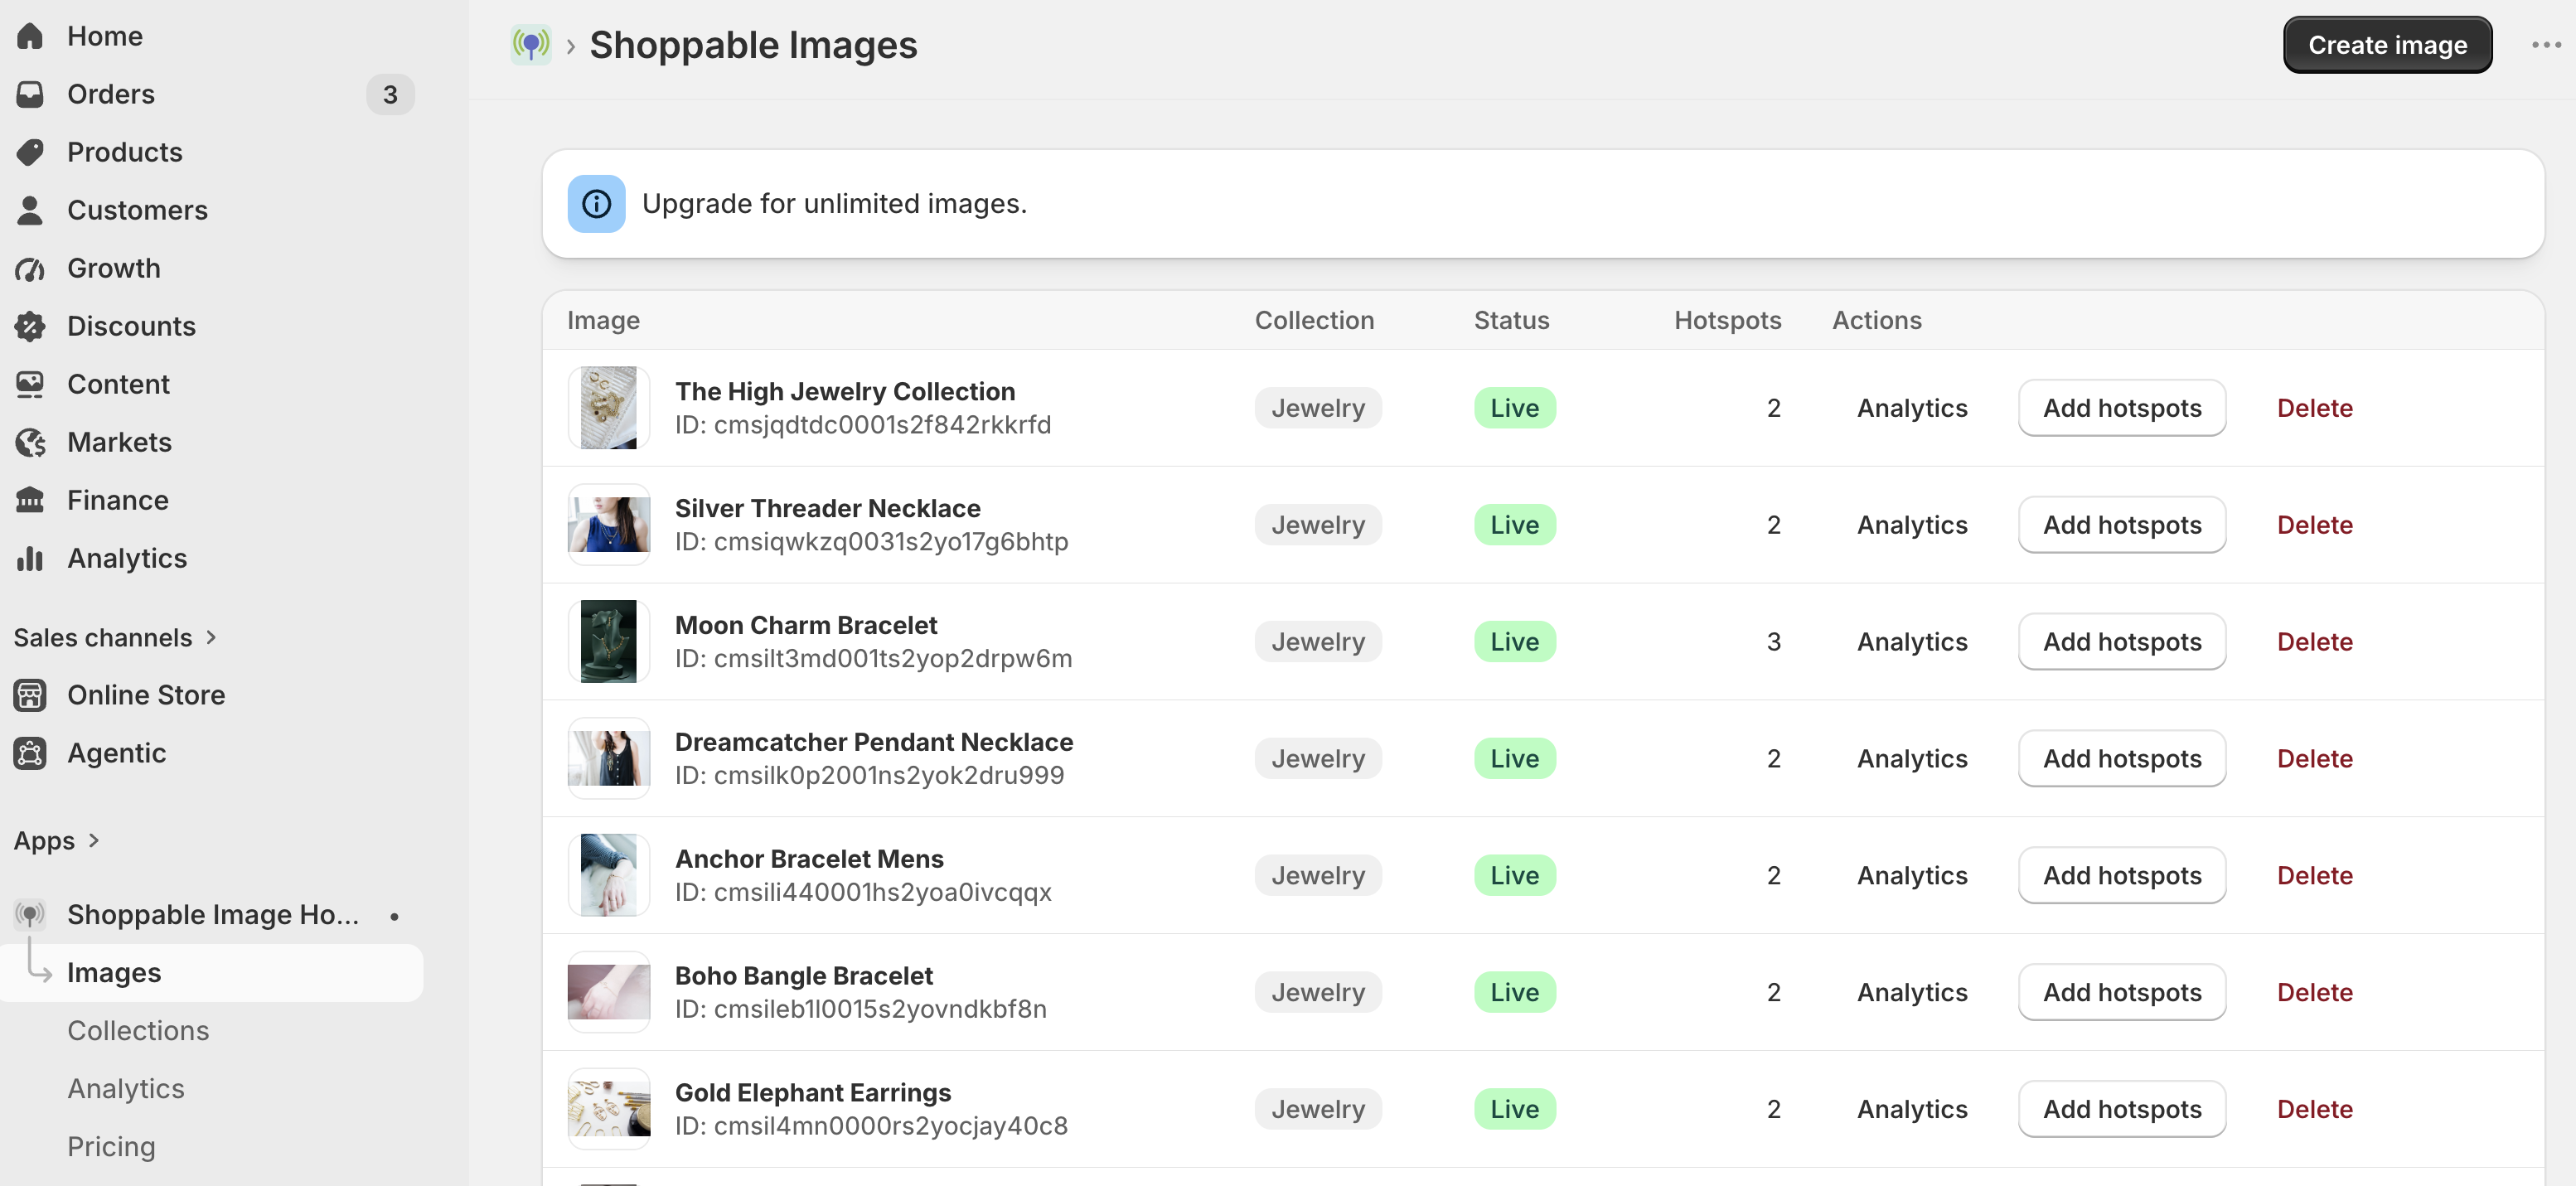
Images shows every image you have created, with:
| Column | Meaning |
|---|---|
| Title | The name you gave the image, plus its image ID underneath |
| Collection | The collection it belongs to, or blank |
| Hotspots | How many pins are on it |
| Status | Live, Hidden, or Locked |
| Actions | Open the hotspot editor, edit settings, or view analytics |
Status badges
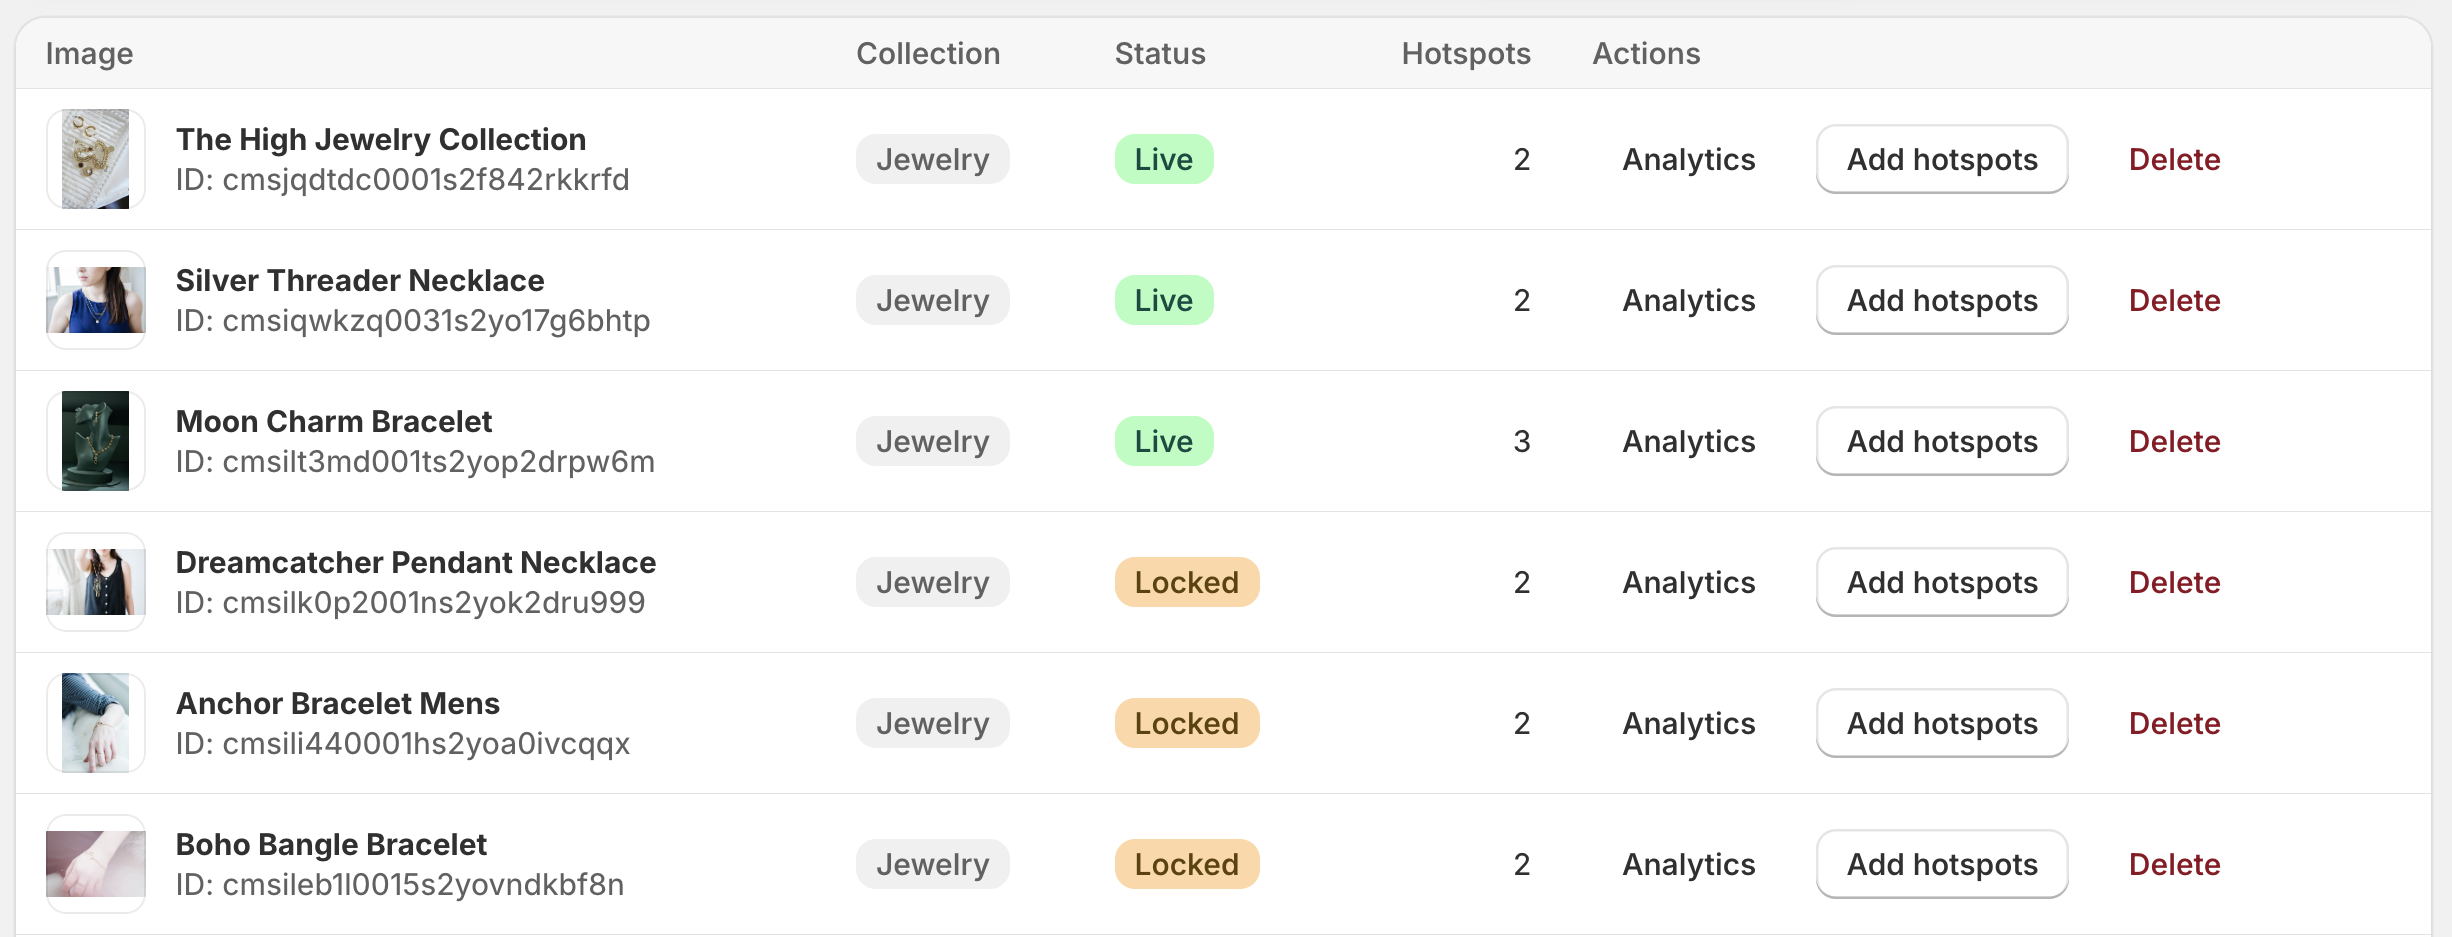
| Badge | What it means |
|---|---|
| Live | Published and rendering on your storefront |
| Hidden | You turned off Published. The image and its hotspots are kept, but the block renders nothing |
| Locked | Blocked by the Free plan’s 3-image limit. Not rendering on your storefront. Upgrade to unlock — see Billing & Plans |
Finding the Image ID
The image ID is what connects an image in the app to a block in your theme. You will need it when you configure the Shoppable Image block.
It is shown on the Images list directly under each image title, as ID: …. Copy it and paste it into the block’s Shoppable Image ID setting in the Theme Editor. See Theme Blocks.

Editing an Image
From the images list, choose Edit (or open the image and use the edit action). You can change:
- Title
- Collection — move it into or out of a collection, or clear the assignment
- Published — see below
Changes are saved with the save bar at the top of the page.
Note: You cannot swap out the picture on an existing image. If you need a different photo, create a new image and place its hotspots there. This is deliberate — hotspot positions are stored as percentages tied to the original picture, and swapping the file would leave every pin in the wrong place.
Publishing and Hiding
The Published switch controls whether the image renders on your storefront.
- On — the block shows the image and its hotspots. Status is
Live. - Off — the block renders nothing for that image. Status is
Hidden.
This is the right tool for a seasonal image you want to bring back later, or for building an image out of view before it goes live. Hidden images keep all their hotspots and all their click history.
On the Free plan, if an image is locked by the plan limit the Published switch is disabled and shows “Locked by the Free plan — upgrade to publish.” The lock is managed by the app based on your plan; you cannot override it manually.
Deleting an Image
Open Edit on the image and use Delete image. Deleting is permanent and also removes:
- every hotspot on that image, and
- the entire click history for those hotspots.
The picture itself stays in your Shopify Content → Files library — the app only removes its own record.
Warning: Deleting cannot be undone. If you only want to take an image off your storefront, turn Published off instead.
Which Images Render on the Storefront
An image only appears to real shoppers when all three of these are true:
- Published is on,
- it is not locked by the Free plan limit, and
- its ID is entered into a Shoppable Image block on a live page — or it belongs to a collection whose ID is in a Shoppable Collection block.